How to quickly and easily create staging/development sites - Self-manage
Hosting WordPress on Amazon Lightsail is a cost-effective way to adopt the cloud and benefit from the security and scale of AWS. By using Seahorse software users have the tools to utilize the flexibility that AWS cloud hosting provides. This tutorial will guide self-managed users through the process of creating a staging or development environment from your existing Seahorse integrated instance.
This gives users the ability to spin up direct replicas of production sites in minutes to deploy, test, and review before production deployment. This level of flexibility re-imagines the CI/CD process in Lightsail because staging/development sites can be shut-down immediately after use minimizing costs.
● Managing staging/development sites in AWS Lightsail
Skills and Specialized Knowledge
Users need basic WordPress administration skills to deploy and manage the plugin.
Additional knowledge of AWS and server management is beneficial but not required.
Users do not need an AWS account but must use a compatible operating system along with a supported DB format.
About this Tutorial
Time
10-15 minutes
Cost
Licenced Use
Use Case
Compute
Products
Amazon Lightsail
Level
100
Last Updated
Feburary 2, 2024
Requirements
Web Server
Apache, Nginx, Windows
Min. PHP Version
v7.0
Database
MySQL or MariaDB
Min. WP Requirement
v5.3
Enabled PHP Functions
fopen(), cURL
Step 1: Overview
This guide assumes users are already using Seahorse software allowing for the options outlined below:
* If you are creating an instance directly from a snapshot, go to Step 7
Brought to you by Seahorse — an AWS partner
Step 2: Configure your new Instance from Snapshot
In this step you will learn how to configure your new instance from a snapshot
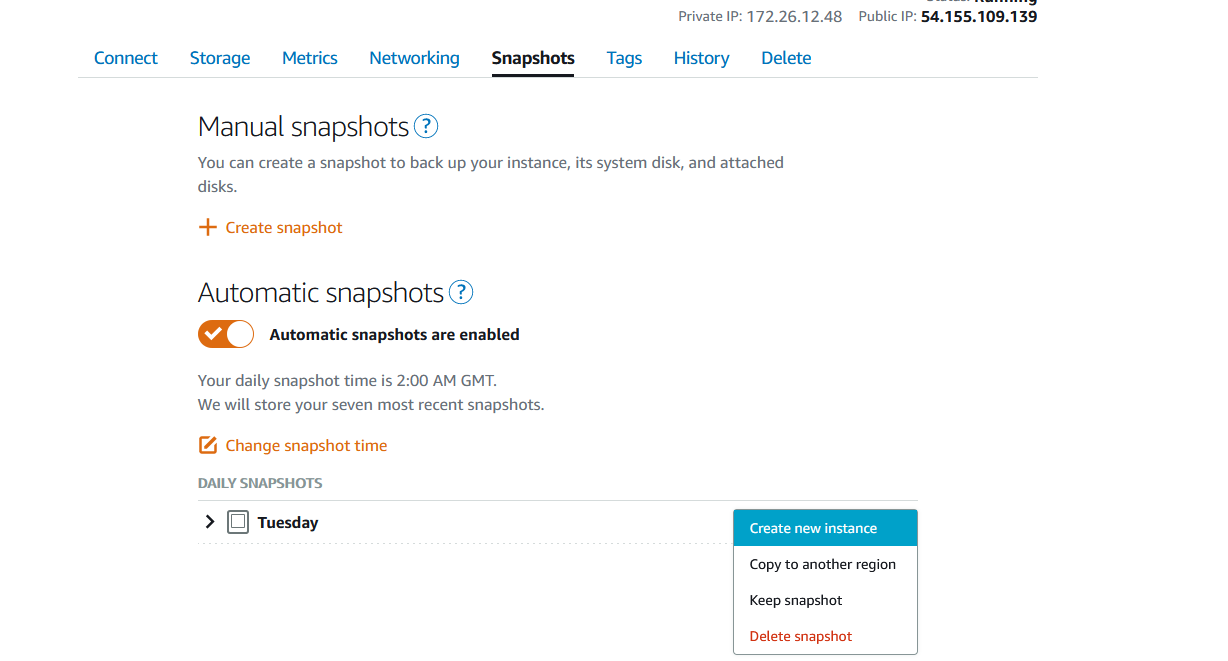
2.1 Log into your AWS Lighsail Console, navigate to the instance created and click on the Snapshots Tab.
2.2 From here you can ‘+ Create Snapshot’ and ‘Create new Instance’ from the snapshot created
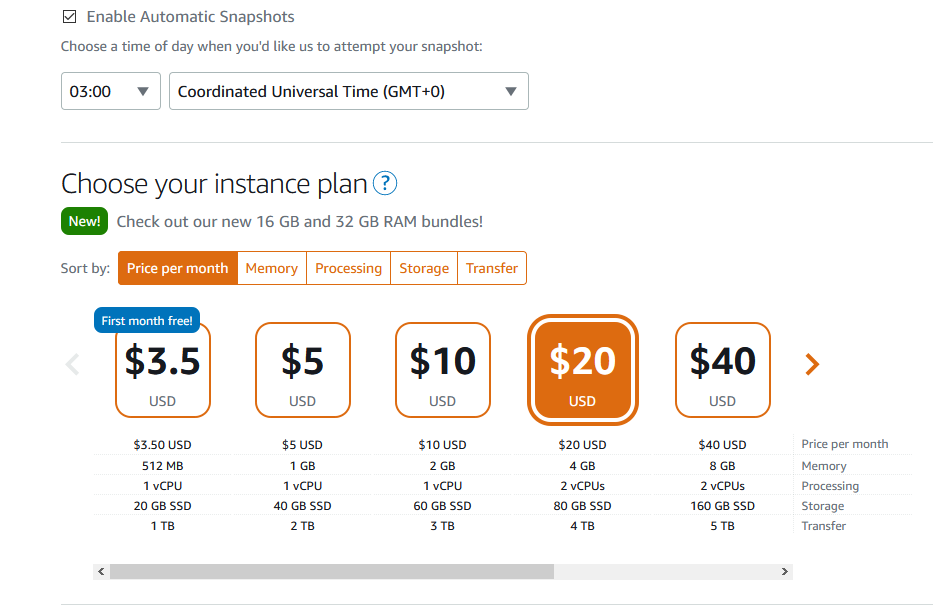
2.3 Select your SSH Key, Enable Auto Snapshots, instance type, and Name your new instance
Step 3: Create static IP and assign to your instance
In this step you will learn how to create a static IP & assign it to your instance.
3.1 In the Networking tab, click Create Static IP
3.2 Instances in your chosen region not currently assigned to a Static IP will be presented. Selected your instance.
3.3 Set a specific identifier name for your static IP
Step 4: Create CPU Utilization alarm
In this step we will create a CPU Utilization alarm to monitor your new instance
4.1 Select the metrics tab of your instance
4.2 Choose the CPU Utilization metric and Add Alarm.
*Our recommendation is greater than or equal to 60% for 2 times in the last 20 minutes. We also advise adding a notification method (email or SMS)
Step 5: DNS update and install of SSL Certificate
The final step is point your domain at the Static IP you created and to install and configure an SSL cert for your domain so the site can run over HTTPS.
5.1 Point your domain at your newly created Static IP
5.2 Once your DNS change has propagated run the following command via your chosen SSH client
sudo /opt/bitnami/bncert-tool
* The bncert tool is self explanatory and will configure a cron to auto renew your cert so the process only has to be run once
5.3 Than It will ask for the domain list you want to install SSL certificate and complete the process.
Step 6: Management Overview Console
Finally here is an overview of the Management Console that is available within your Staging WordPress website on AWS.
6.1 — Once your Staging Website has been launched on AWS Lightsail, a Management Console is available by clicking the WP Manage AWS tab on the Plugin Menu (on the cloned site)
From this Console, key information about your AWS server is available. Actions can also be carried-out on your AWS Server from within the Management Console, such as: ● Reboot ● Change Tier ● Change Region ● Create Snapshot ● Boot from Snapshot ● Add Alarms
Congratulations
You have now created a direct replica of your your WordPress website running on Amazon Lightsail